Execute Work Orders
From the Navigation Sidebar, select 'Maintenance' and from the Navigation Dropdown, select 'Operational' or simply click on the Operational tile on the Maintenance Dashboard.

Now select the 'Execute' tab to view the Work Orders in this status within the workflow.

This section displays all Work Orders that require execution and have been assigned to either an individual or a Work Group:
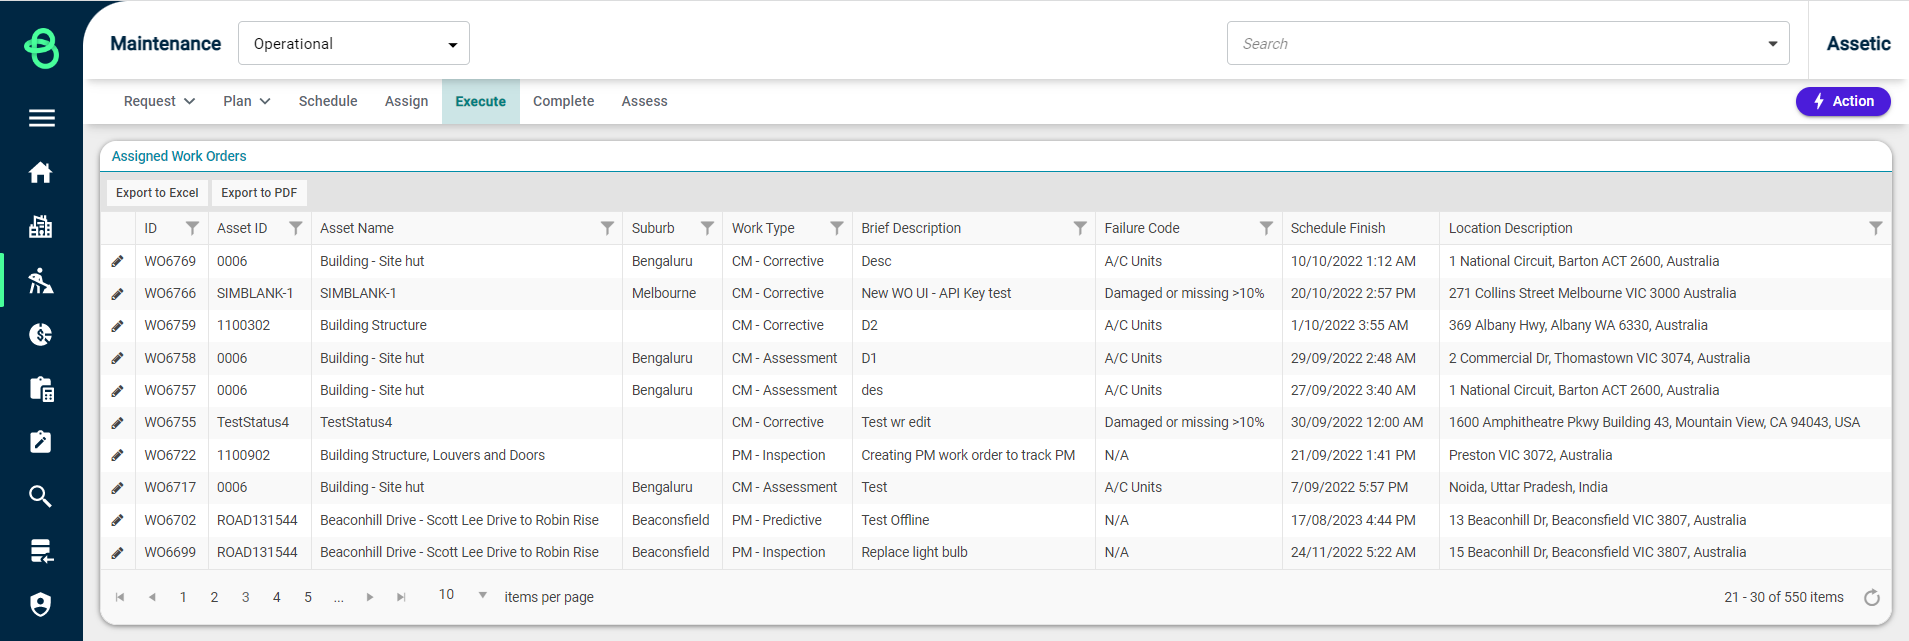
The following information is displayed.
-
Work Order ID: Automatically populated field that draws on the unique work order ID.
-
Asset ID: The unique identifier of the affected Asset selected for the Work Order.
-
Asset Name: Automatically populated field that displays the name of the affected Asset.
-
Suburb: Automatically populated field that displays the Suburb where the Asset is located.
-
Work Type: Automatically populated field that displays the work type.
-
Brief Description: Automatically populated with the description information that was entered while creating the WO.
-
Failure Code: The Failure Code selected for the Work Order.
-
Scheduled Finish: Automatically populated field that details when the work is to be completed by.
-
Location Description: Automatically populated field that provides the address description of the Defect Location for the Work Order.
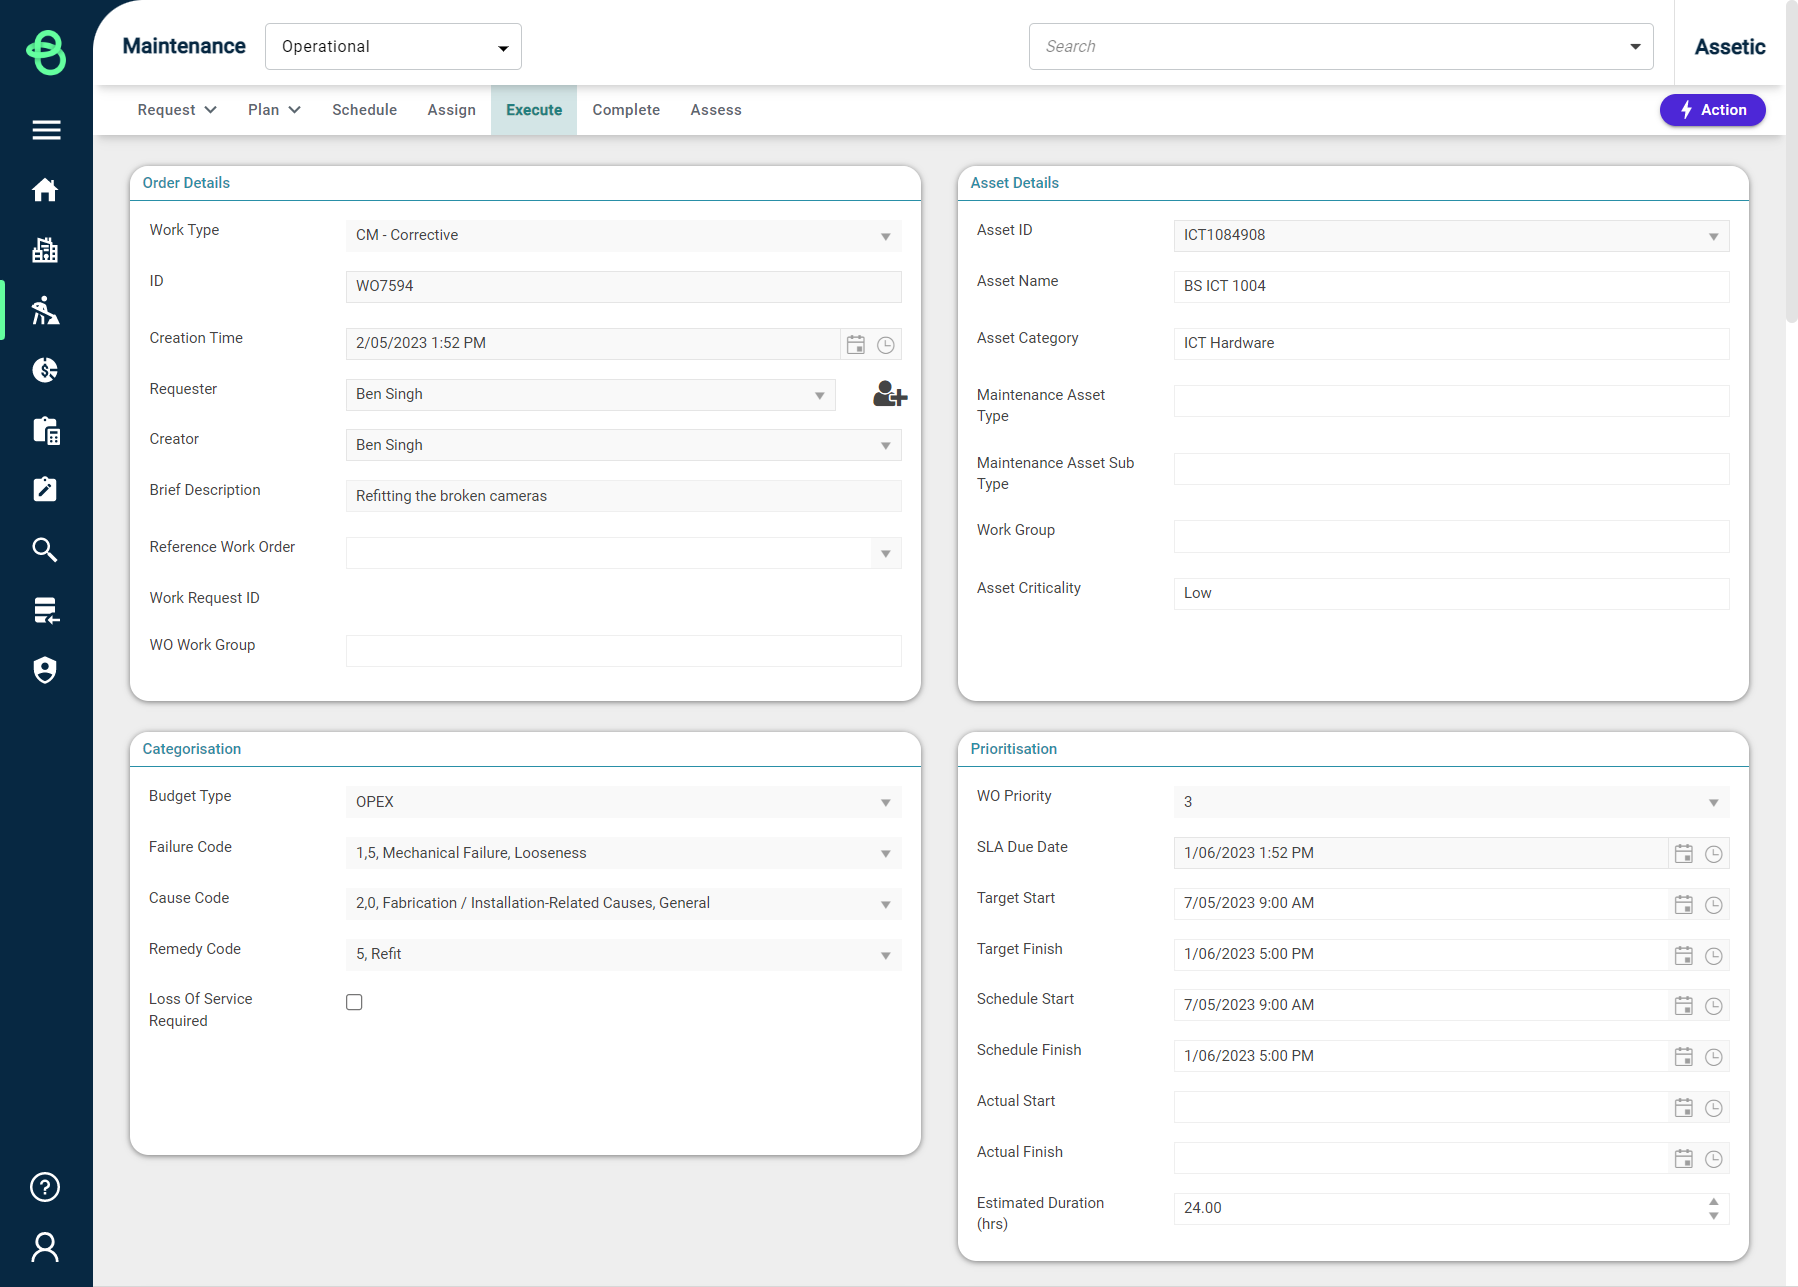
Once the list of Assigned Work Orders is available, click on the pencil ( ) to the left of each row, which will allow viewing of the Work Order details:
Prioritisation
-
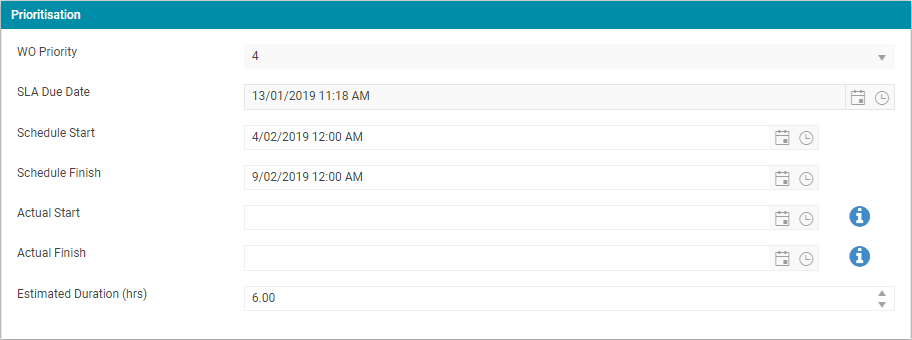
WO Priority: The priority is selected from a drop-down list. The priority is configured in the Admin Maintenance area and is linked to an asset type. This assists in generating the SLA Due Date.
-
SLA Due Date: The service level agreement (SLA) due date is automatically generated after the priority has been selected.
-
Schedule Start: This field contains the date on which the work is scheduled to start.
-
Schedule Finish: This field contains the date on which the work is scheduled to finish.
-
Actual Start: This field contains the date on which the work is scheduled to start. If this field is empty when labour is completed by a resource, the field is automatically populated with the earliest date and time that work was completed by a resource.
-
Actual Finish: This field contains the date on which the work is scheduled to start. If this field is empty when labour is completed by a resource, the field is automatically populated with the latest date and time that work was completed by a resource.
-
Estimated Duration (hrs): This field is manually entered based on the expected time it would take for the work order to be completed. The estimated duration uses Hours as the Unit Type.

Tasks
-
Work Task Id: Automatically generated ID that is sequential and increases by units of 10.
-
Lowest Maintainable Item: Clicking ‘Select Item’ will open a screen showing the Location Details of the Asset. If the Asset has any components, one can be selected to allocate it to a task.
-
Brief Description: A free text field to add a description of the task.

Labour
-
Work Task Id: Shows the linked Work Task Id, if configured.
-
Work Group: The Work Group for the selected Craft.
-
Craft: The selected Craft.
-
Unit: The Unit Type for the selected Craft.
-
Craft Quantity: Number of the selected Craft required.
-
Hours Required: The expected number of hours required to complete the labour.
-
Planned Cost: The cost as calculated by the quantity.
-
Actual Costs: The actual costs involved to complete the labour.

Resources

-
Work Task Id: Automatically generated ID that is sequential and increases by units of 10.
-
Status Id: The Status Id field is automatically populated to show the current Work Order status.
-
Craft: The selected Craft.
-
Resource: The resource has been assigned to work on the craft.
-
Actual Hours: Time spent on the resources.
-
Completion Date: The Completion Date is the date the resource finishes its work.
-
Resources must be assigned to an assessor and must be in a 'complete' status to be able to complete a Work Order.
-
All the Resources must be in a Completed state to be able to complete a Work Order.
-
Materials
-
Work Task Id: Automatically generated ID that is sequential and increases by units of 10.
-
Description: A description of the selected Material.
-
Material: The selected material.
-
Materiel Unit Type: The unit of measure for the selected Material.
-
Material Availability: A checkbox which indicates if the Material is available or not.
-
Planned Quantity: The expected amount of Material required.
-
Planned Cost: The expected cost of the required Material.
-
Actual Quantity: The actual amount of Material used.
-
Actual Cost: The actual cost of the used Material.
Clicking on the 'Edit' button allows for the materials to be updated.

Services

-
Work Task ID: The ID of the linked Work Task, if applicable.
-
Description: A description of the Service. This can be pre-filled by selecting a Service Activity from the Service Activity drop-down when adding a Service.
-
Service Quantity: Number of services used.
-
Purchase Order Ref: A free-text field for a purchase order reference.
-
Unit Type: The unit type that the Service quantity and rate is measured in. This can be pre-filled by selecting a Service Activity from the Service Activity drop-down when adding a Service.
-
Cost: Estimated cost of the service.
-
Actual Quantity: The actual amount of Service required.
-
Actual Unit Rate: The actual per-unit cost of the Service.
-
Actual Cost: A calculated field that shows the actual total cost of the Service.
-
Cost Code: A code to link the service with a financial system.
-
General Ledger: A General Ledge number to link the service with a financial system.
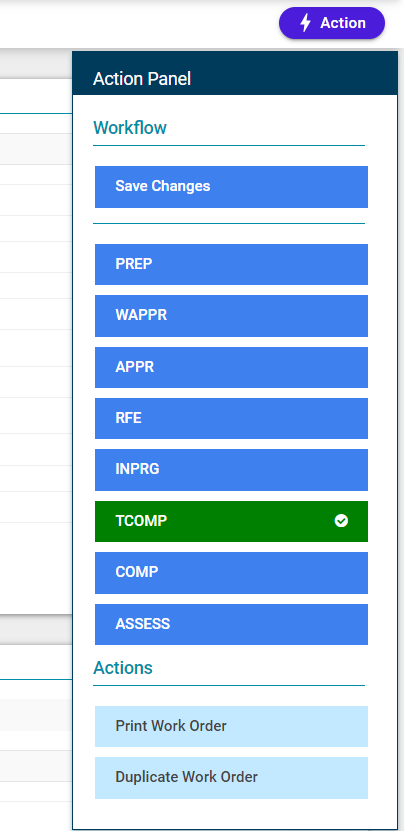
The above-discussed sections are mandatory to be filled to Execute a Work order. Once these sections are populated with relevant details, click on the 'Action' button and select 'TCOMP'.
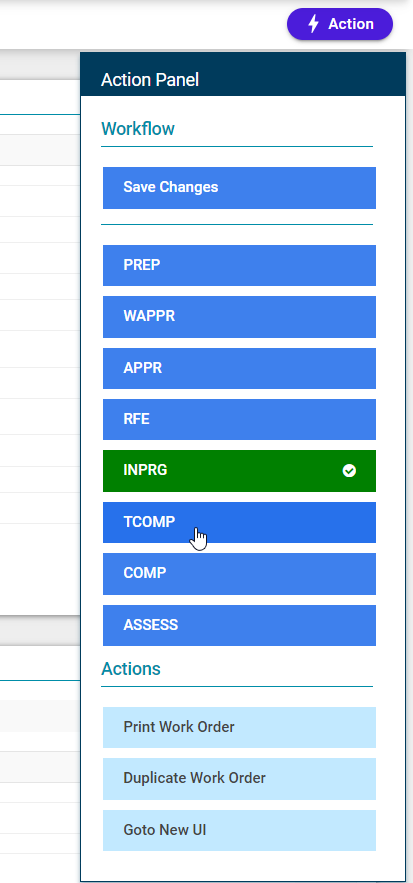
This will Execute a Work Order and a confirmation message is displayed as shown below:

The status of the Work Order will now be changed from 'In Progress' to 'TCOMP' as shown below:
